FTP Client Setup
In this section you will find a graphical
walkthrough of two common FTP clients. The first is SmartFTP, which
is used with Windows Operating Systems. The other FTP Client described
below is Fetch, which is commonly used with Macintosh computers.
|
SmartFTP for Windows Users
If you have a Windows operating system, click here for instructions on
setting up SmartFTP.
|
|
Fetch for Macintosh Users
If you have a Macintosh operating system, click here for instructions
on setting up Fetch.
|
SmartFTP
When using an FTP Client such as SmartFTP, your settings
should match the following:
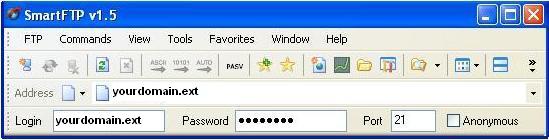
The Address will be yourdomain.ext.
The Login is yourdomain.ext.
The Password should be the Administrator
password for your account.
|
Note: You should not be trying
to FTP using Anonymous Login.
|
|
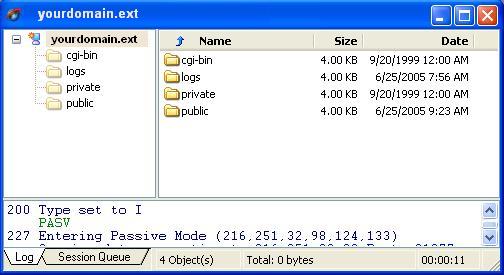
When you are logged in, the program should look
something like this:
|
 |
|
| Notice we are in the "/" directory. To switch to the "/public" directory, double-click
the "/public" folder and it should look like this: |
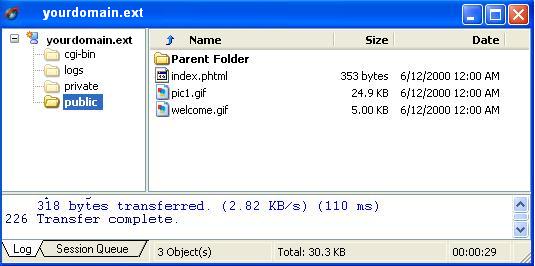 |
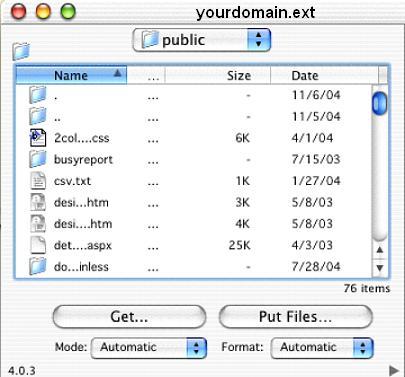
| For this account, the "/public" folder is where you want to load files you wish to be shown
on your website. | |
| ^ Back to Top |
Fetch
| When using an FTP Client such as Fetch, your
settings should match the following: |
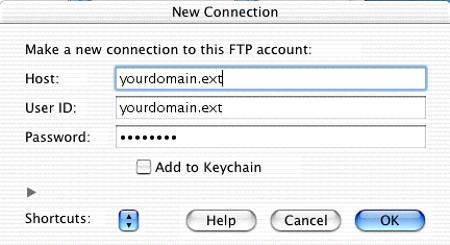 |
| The Host is yourdomain.ext.
|
| The User ID should be
yourdomain.ext.
|
| The Password should be the
Administrator Password for your account.
|
| Click OK to log on.
|
| Now you should see something similar to this: |
 |
| If you want to add files to the "/public"
directory, click on the public folder under the name section. Then
click Put Files. You will then see this screen: |
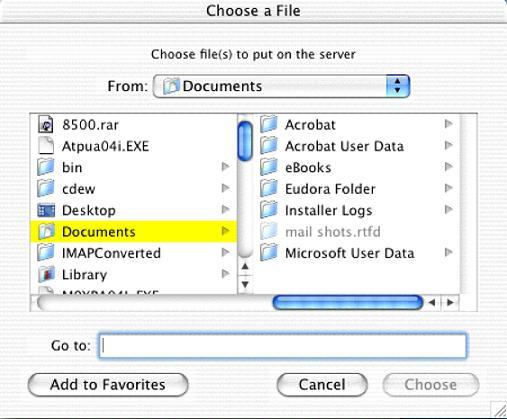 |
| Select the file or folder you want and click
Open. Find the file you are looking for and upload it. Any files you
want to be publicly viewable need to be in the "/public" directory. |
| ^ Back to Top |
|
