|
|
| 1. Open Mail by clicking on the Mail icon in the Dock, or by opening the Macintosh HD, opening the Applications folder, and double clicking on the Mail icon.
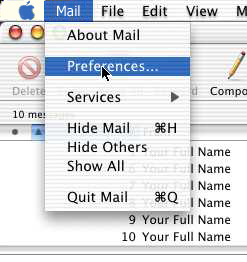
2. Click the Mail menu and choose Preferences.
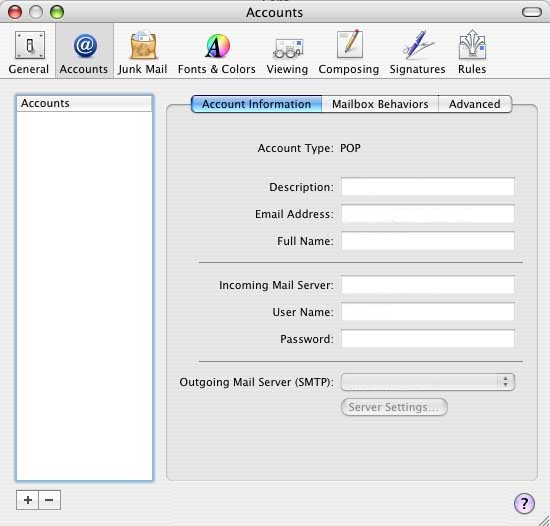
3. Click the Accounts button at the top, on the left. Click the plus (+) button at the bottom left.
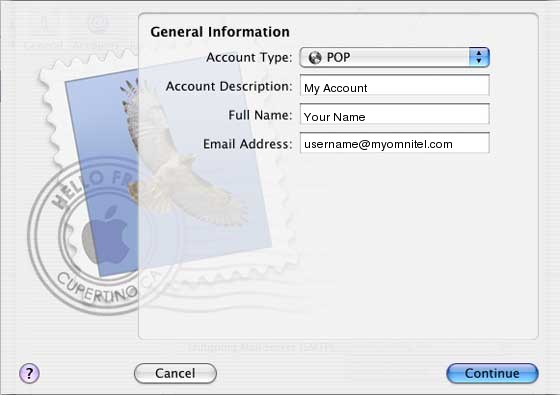
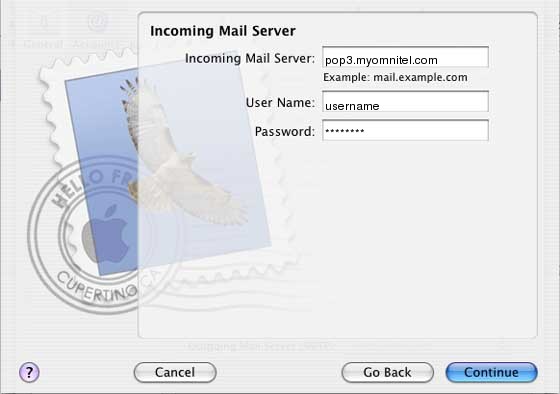
4. For Account Type, select POP Account. 5. Once you have selected a POP Account, fill in the following fields;
6. Click Continue
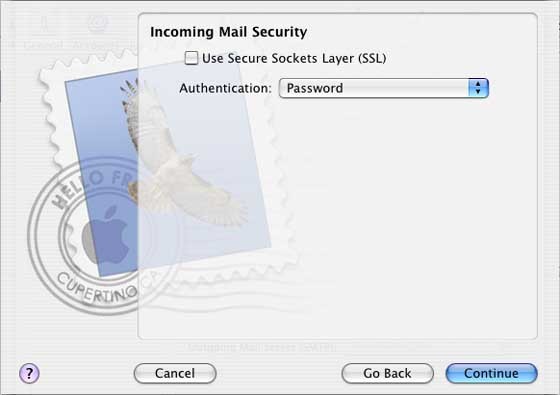
7. Click Continue. 8. Leave this screen as it is and click Continue.
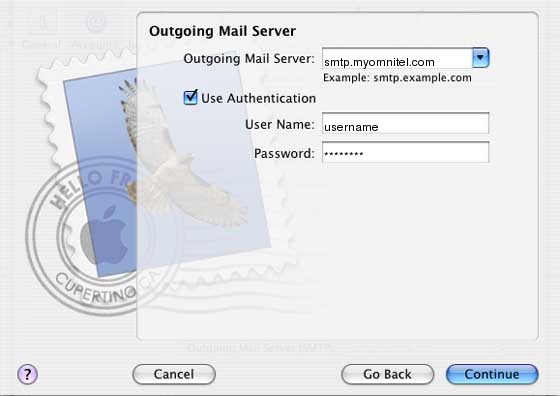
9. On the Outgoing Server page:
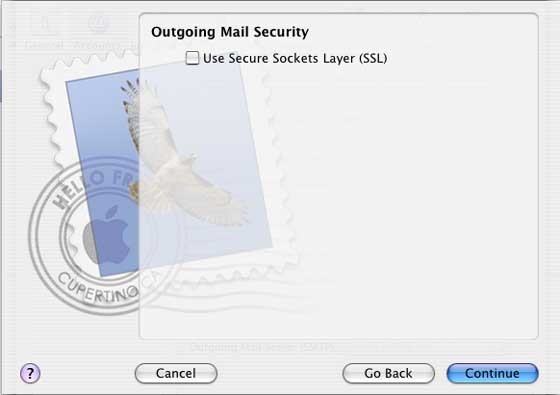
10. Click Continue. 11. Leave this screen as it is and click Continue.
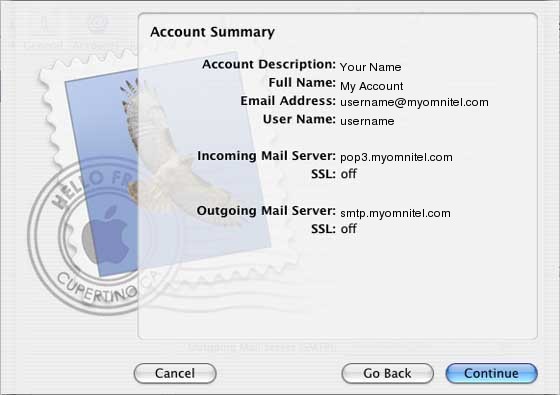
12. If all of the settings appear to be correct, click Continue, or you can go back and correct any typos you might see.
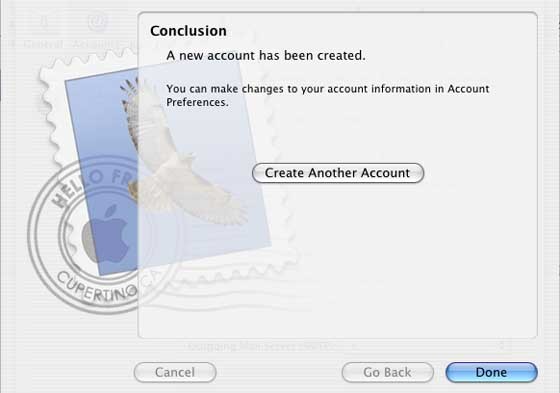
13. Click Done.
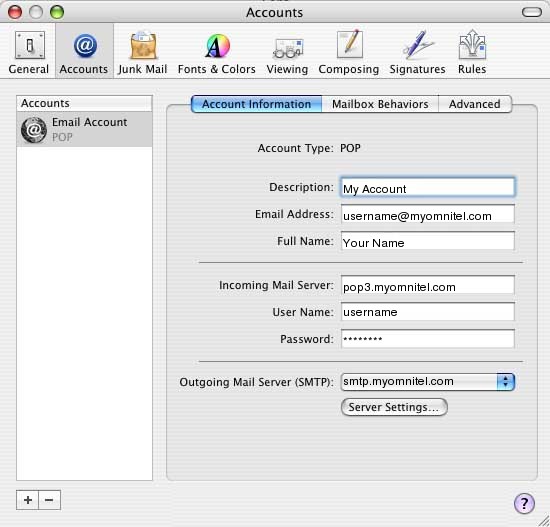
14. Click Server Settings.
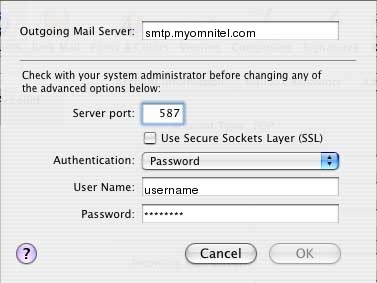
15. Here:
You are now ready to begin using your new mail account. |
|
All text and original graphics copyright ©1993-2011 OmniTel Communications All Rights Reserved. |